
cold foam recipe

Coffee fans are finding out about cold foam. It’s a creamy topping that makes iced coffee drinks special. Whether you’re after a cool cold brew foam or want to make your favorite cafe drink, making cold foam is simpler than you think.
Cold foam has changed how we enjoy iced coffee. It brings a luxurious texture and a pro finish to our homemade drinks. This new method lets you make cafe-quality drinks at home. It turns your morning coffee into a fancy treat.
Key Takeaways
- Cold foam adds a premium touch to iced coffee drinks
- You can easily create professional-quality foam at home
- Multiple milk types work for creating cold foam
- Proper technique is crucial for perfect foam texture
- Cold foam works with various coffee beverages
Understanding Cold Foam and Its Rise in Coffee Culture
Cold foam has changed how people enjoy coffee. It’s become a key part of coffee shop trends. It adds a new texture and look to coffee drinks.
Cold foam is a big change in how coffee is made. It’s different from hot frothed milk foam. Coffee lovers everywhere are excited about it.
What Makes Cold Foam Unique
Cold foam is special for a few reasons:
- It’s lighter and fluffier
- It stays firm even when it’s cold
- It makes drinks look amazing
- It lets you try new flavors
The Science Behind Perfect Cold Foam
Getting cold foam just right takes skill and knowledge of milk. The steps include:
- Picking the best milk
- Using special frothing methods
- Keeping the right temperature
- Getting the foam just right
| Foam Type | Temperature | Texture |
|---|---|---|
| Hot Foam | 140-160°F | Dense and thick |
| Cold Foam | 32-40°F | Light and airy |
Evolution of Coffee Shop Trends
The rise of cold foam shows a bigger change in coffee culture. Instagram-worthy drinks and unique experiences have led to new ways of making coffee. Cold foam is a sign of this creativity.
Baristas and coffee fans are always trying new things with cold foam. They’re exploring what’s possible with this exciting technology.
Essential Tools and Ingredients for Cold Foam
Making cold foam at home needs the right tools and ingredients. Whether you want to make Starbucks-style cold foam or your own, knowing the essential tools is key.

- Electric milk frother
- French press
- Handheld whisk
- Blender with whisk attachment
Choosing the right milk is vital for great cold foam. Different milks give unique textures and tastes:
| Milk Type | Foam Quality | Recommended Use |
|---|---|---|
| Nonfat Milk | Light, airy | Classic cold foam |
| Oat Milk | Creamy, thick | Vegan alternative |
| Heavy Cream | Rich, dense | Indulgent cold foam |
Want to make your cold foam even better? Try these extra ingredients:
- Vanilla syrup for sweetness
- Flavored syrups
- Spices like cinnamon or nutmeg
- Sugar-free sweeteners
Pro tip: Try different tools and ingredients to find your favorite cold foam recipe. The most important thing is to keep practicing and find what you like best.
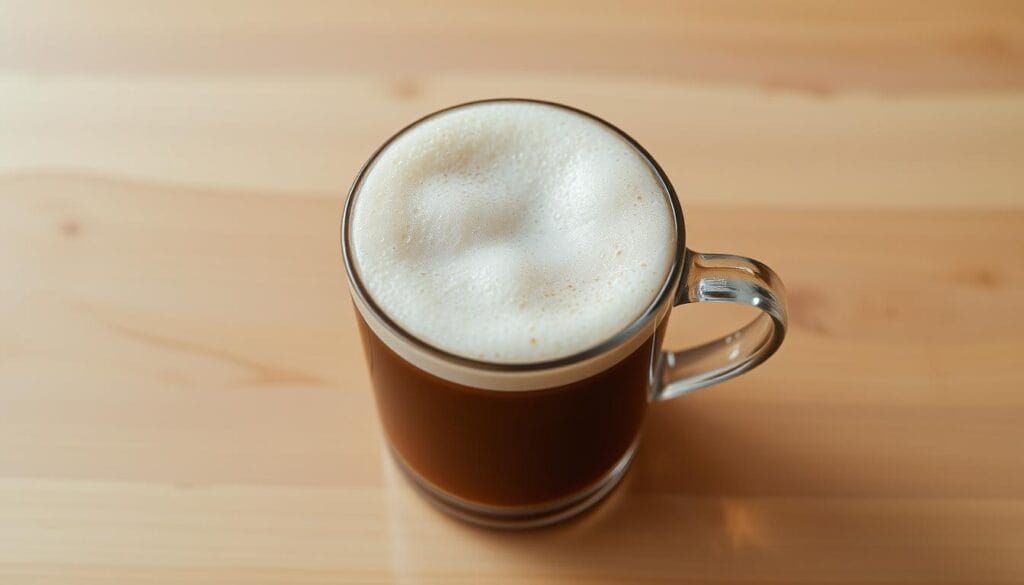
Basic Cold Foam Recipe for Coffee Drinks
Making the perfect cold foam can turn your home coffee into something special. Cold foam adds a luxurious touch and looks great, making your coffee drinks even better.
Learning to make cold foam starts with picking the right ingredients and techniques. This is where you start to make iced coffee foam like a pro.
Selecting the Right Milk Type
The secret to great cold foam is choosing the right milk. Here’s how different milks affect your foam:
- Whole milk: Makes the richest and most stable cold foam
- Skim milk: Creates lighter, fluffier foam
- Oat milk: Offers a creamy option for those who don’t drink dairy
- Heavy cream: Makes an extra-thick iced coffee foam
Step-by-Step Preparation Process
Making cold foam needs precision and the right tools. Follow this easy guide for top-notch results:
- Chill your milk or cream before starting
- Use a handheld milk frother or blender
- Blend at high speed for 20-30 seconds
- Stop when the foam is thick but still smooth
Temperature and Timing Tips
Getting cold foam right depends on keeping things cold. Keep your frothing tools in the fridge for the best results. Aim for a temperature between 35-40°F. This keeps the foam from falling apart too fast.
Pro tip: Always start with cold ingredients for the most stable iced coffee foam.
With these tips, you’ll make cold foam that’s as good as what you get in restaurants. Your homemade coffee will look and taste amazing.
Mastering Starbucks-Style Cold Foam at Home
Bringing the cafe experience to your kitchen is easier than you might think. Especially when it comes to creating starbucks cold foam. With a few simple techniques, you can turn your home-brewed coffee into a top-notch drink.
To make the perfect cold brew foam, you’ll need some specific tools and ingredients. Here’s what professional baristas recommend:
- A handheld milk frother or blender
- Cold, fresh milk (preferably whole milk)
- Vanilla syrup (optional)
- A tall, narrow container for frothing
The secret to authentic Starbucks-style cold foam lies in the technique. Cold foam differs from traditional hot foam because it’s created using non-heated milk. This means you’ll want to use very cold milk and whip it at high speed to create those signature micro-bubbles.
Start by chilling your frothing container in the freezer for a few minutes. Pour cold milk into the container, then use your frother at a high speed. The goal is to create a thick, velvety texture that sits beautifully on top of your cold brew or iced coffee.
Pro tip: For the most authentic starbucks cold foam, aim for a consistency that’s thick enough to sit on top of your drink without immediately sinking.
Practice makes perfect when creating cold brew foam at home. Don’t get discouraged if your first attempts aren’t café-quality. With a bit of patience and technique, you’ll soon be crafting professional-level cold foam that transforms your homemade coffee drinks.
Flavored Cold Foam Variations
Make your cold foam recipes exciting with new flavors. This turns simple cold foam into amazing coffee drinks. Try different flavors to make drinks that wow your friends.
Cold foam is more than just texture. It’s about making unforgettable tastes. With simple ingredients, you can make tasty cold foam that goes great with coffee.
Vanilla Bean Cold Foam
Make a fancy vanilla bean cold foam for your drinks. Use top-notch vanilla beans or pure vanilla extract. Here’s how to do it:
- Use cold heavy cream or non-fat milk
- Add 1-2 teaspoons of vanilla bean paste
- Blend until soft peaks form
Caramel Cold Foam
Enjoy a sweet caramel cold foam with your coffee. It adds a rich flavor to your foam:
- Mix cold cream with caramel syrup
- Whip until light and airy
- Drizzle extra caramel on top for garnish
Pumpkin Spice Cold Foam
Get the autumn vibe with pumpkin spice cold foam. It adds warmth to your coffee:
- Blend cold cream with pumpkin puree
- Add pumpkin pie spice
- Whip until frothy and smooth
Try these cold foam recipes to find your favorite flavor. Each one gives a new twist to cold foam, letting you tailor your coffee just right.
Pairing Your Cold Foam with Different Coffee Drinks
Making the perfect iced coffee foam is like an art form. It turns your daily coffee into something special. Cold brew foam adds a unique touch to your coffee, making each sip a delight.
When you mix cold foam with different coffee bases, keep these tips in mind:
- Match the flavor intensity of your coffee and cold foam
- Try out flavors that go well together
- Think about the texture and temperature of your coffee
Here are some classic pairings to get you started:
- Vanilla Cold Foam with Cold Brew: A smooth mix that balances out the coffee’s richness
- Caramel Cold Foam with Espresso: A sweet treat that’s indulgent
- Cinnamon Cold Foam with Iced Americano: Brings warmth and depth to a lighter coffee
Your cold brew foam can turn simple drinks into fancy ones. It’s all about knowing how different foams and flavors work with coffee. Begin with tried-and-true pairings, then get creative to find your favorite unique mixes.
Troubleshooting Common Cold Foam Problems
Making perfect cold foam can be tough, even for pros. Knowing common frothed milk foam issues helps make better coffee drinks.
Getting cold foam right needs knowing common problems and fixes. Let’s look at the usual issues you might face.
Texture Issues and Solutions
The right cold foam texture comes from a few important things:
- Milk temperature affects foam stability
- Protein content impacts foam volume
- Frothing technique determines consistency
Common Texture Problems
| Problem | Cause | Solution |
|---|---|---|
| Flat foam | Low-fat milk | Use 2% or whole milk |
| Watery foam | Incorrect frothing technique | Use cold milk, rapid whisking |
| Unstable foam | Wrong milk temperature | Keep milk between 35-40°F |
Storage and Longevity Tips
Storing cold foam right keeps it fresh and fluffy. Follow these tips:
- Store in airtight container
- Refrigerate immediately after making
- Use within 24 hours
Equipment Maintenance
Clean frothing tools well after each use. Cold foam equipment needs special care to avoid residue and keep working well.
Regular cleaning stops bacteria and keeps cold foam quality steady. Get special cleaning tools for your frothers and blenders to make them last longer.
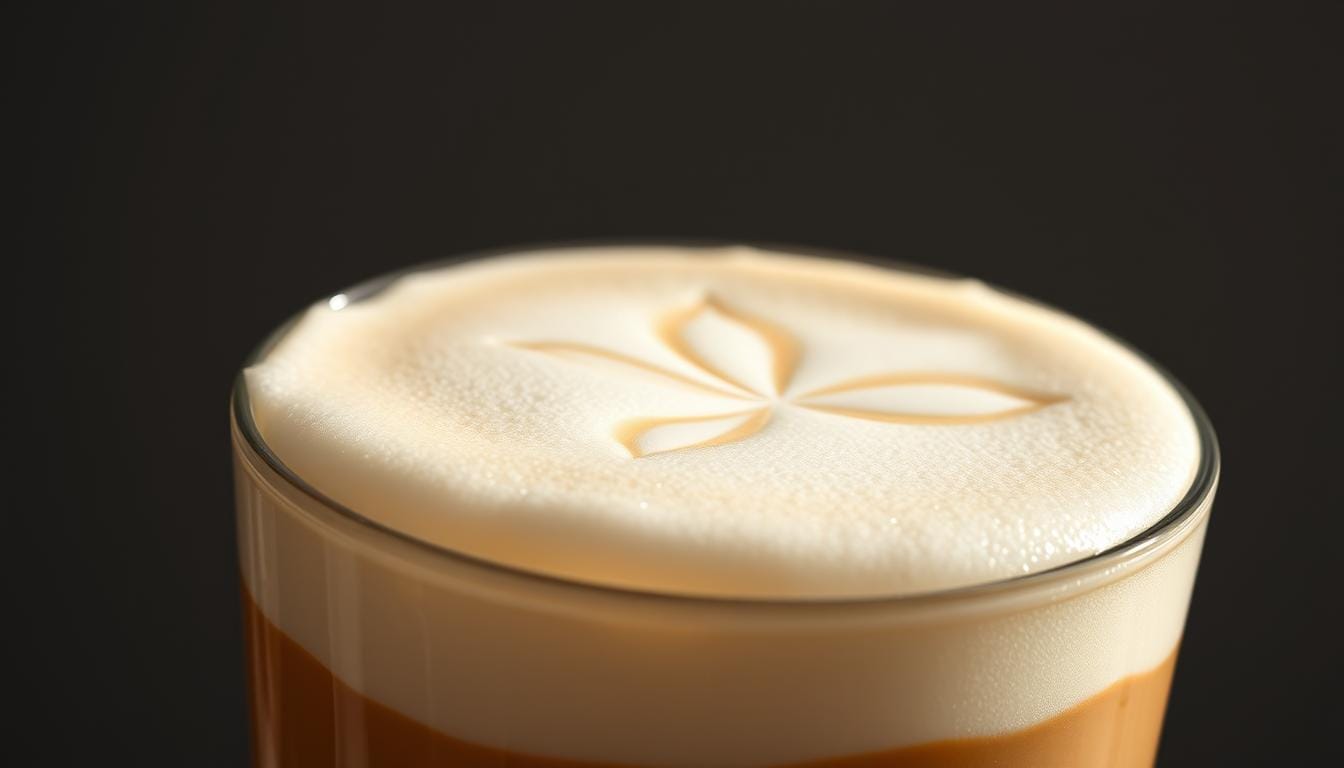
Creating Instagram-Worthy Cold Foam Art
Take your cold foam to the next level by turning simple coffee drinks into stunning visuals. Coffee foam art is not just about flavor. It’s about creating a memorable experience that grabs everyone’s attention on social media.
Begin your cold foam art journey with these key techniques:
- Master basic layering methods
- Experiment with color contrasts
- Learn simple design techniques
Baristas suggest using special tools for better results. A milk frother with different speed settings can help you get the right cold foam texture. Consistency is key in creating stunning visual designs.
“Great coffee foam art tells a story before the first sip”
Color is vital in making your cold foam designs stand out. Try these color combination strategies:
| Color Combination | Visual Effect |
|---|---|
| White + Caramel Drizzle | Classic Elegant Look |
| Vanilla + Cocoa Powder | Rich Contrasting Design |
| Matcha Green + White | Modern Artistic Approach |
For a great Instagram shot, think about lighting and composition. Natural light is best, and a clean background makes your art pop. Be patient and precise to find your own coffee foam art style.
Advanced Cold Foam Techniques for Coffee Enthusiasts
Improving your cold foam skills takes time and focus. Baristas know that making great nitro cold foam is more than just basic steps. You’ll need to learn special methods to turn simple coffee drinks into amazing experiences.
Nitro cold foam is the top level of coffee art. It’s about knowing how molecules and air mix to create smooth, creamy textures. Using the right tools, like fast milk frothers and nitrogen systems, is key to getting that perfect feel.
Creating layers in your cold foam needs careful attention. Try using different pouring techniques and understanding how milk proteins work. This way, you can make your cold foam look as good as it tastes. The right temperature and milk choice are also important for top-notch results.
Getting better at cold foam takes patience and trying new things. Watch how pros do it, get the best tools, and keep practicing. As you get better at working with milk, adding nitrogen, and making your cold foam look great, you’ll be on par with the best coffee shops.
FAQ
What exactly is cold foam?
Cold foam is a light, frothy topping made from cold milk or a non-dairy alternative. It’s made without heat. This makes it perfect for cold drinks like iced coffee, staying creamy on top.
What type of milk works best for making cold foam?
Whole milk is best for cold foam because of its high fat content. This makes the foam stable and creamy. 2% milk also works well. For non-dairy options, barista-style oat milk and almond milk are good choices.
Do I need special equipment to make cold foam at home?
You can use a handheld milk frother or electric frother for the best results. But, you can also make cold foam with a blender, immersion blender, or even a mason jar. Each method has its own advantages, leading to delicious results with practice.
How long does homemade cold foam last?
Cold foam is best eaten right away, within 15-30 minutes. If you store it in the fridge, it will start to lose its texture and separate after an hour.
Can I make cold foam without dairy?
Yes! You can use non-dairy alternatives like oat milk, almond milk, and coconut milk. Look for barista-style versions for better foaming.
Is cold foam the same as whipped cream?
No, cold foam and whipped cream are different. Cold foam is frothed milk, while whipped cream is beaten heavy cream with sugar. Cold foam is lighter and less sweet, perfect for coffee drinks.
How can I add flavor to my cold foam?
Add flavor by mixing flavored syrups like vanilla or caramel into the milk before frothing. You can also add spices like cinnamon or cocoa powder for unique tastes.
Is cold foam only for cold brew coffee?
Cold foam isn’t just for cold brew. It’s great on iced lattes, iced americanos, and even tea. It adds texture and flavor to many cold drinks.
How do I achieve the perfect cold foam texture?
Use cold milk and froth it slowly, creating small bubbles. Avoid over-frothing to keep the foam light and creamy. The perfect cold foam sits well on your drink.
Can I make cold foam ahead of time?
It’s best to make cold foam just before serving. But, you can prepare it a bit ahead. Store it cold and re-whip if it separates. Enjoy within 30 minutes for the best taste and texture.